
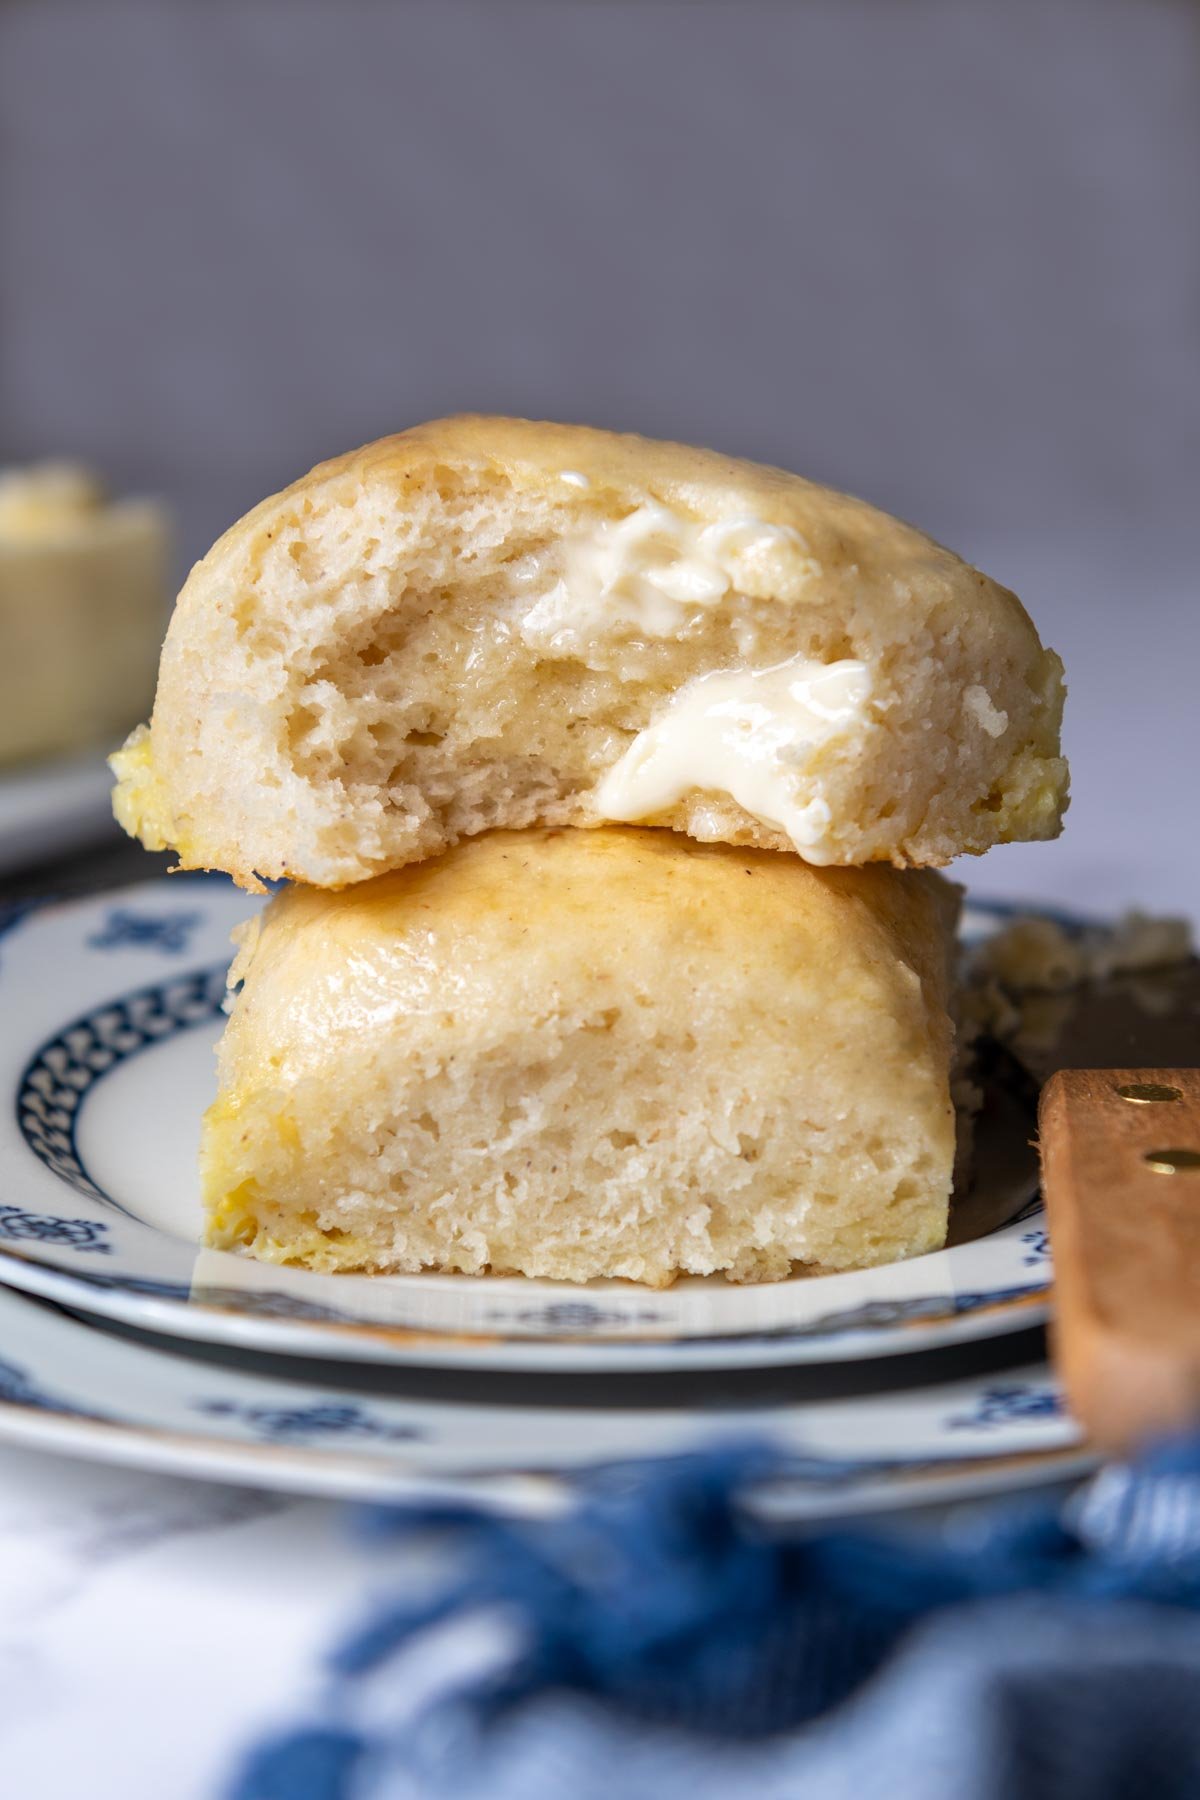
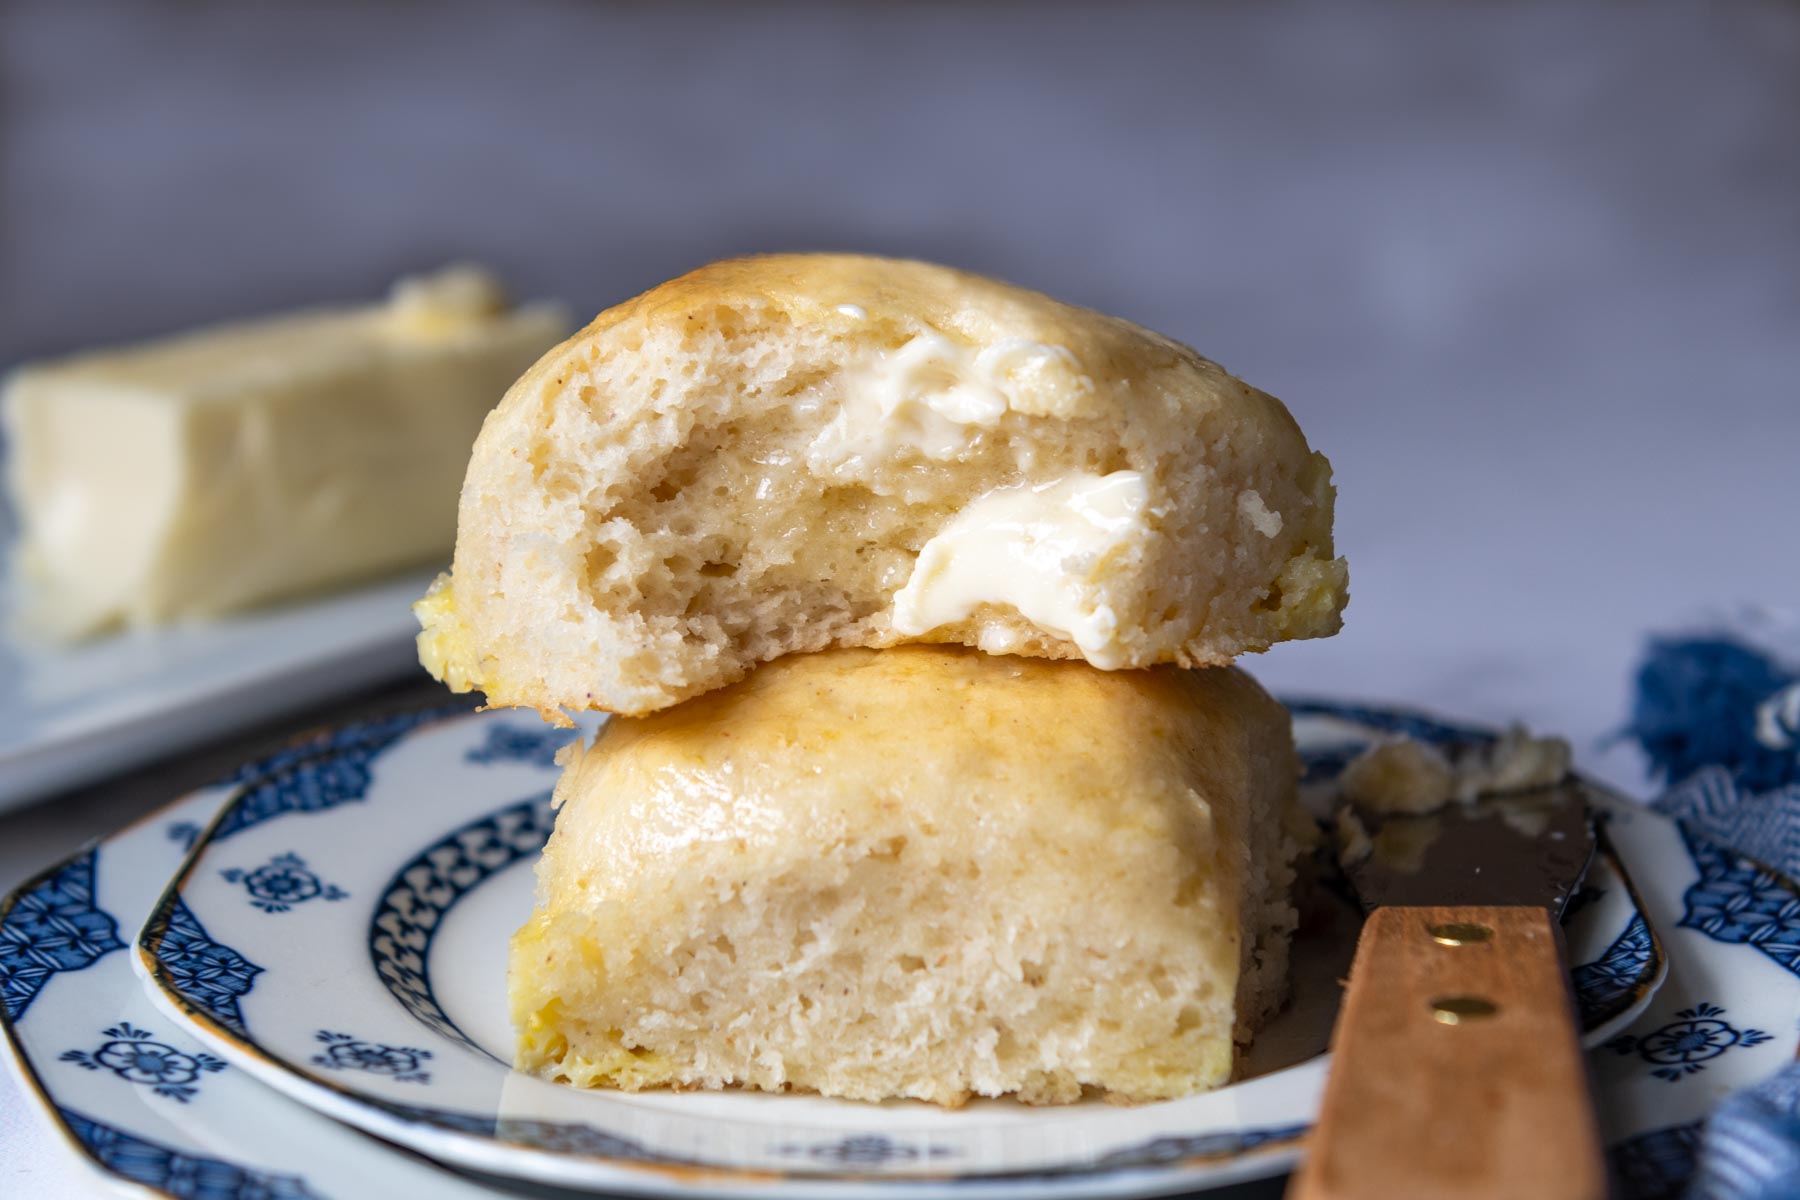
Look no further for the best gluten-free rolls recipe. These fluffy, airy, soft dinner rolls not only have a superior texture, but are easy to make, and ready to serve in one hour! Learn the secret trick to making the best gluten-free yeast rolls ever.
Want to Save This Recipe?
Enter your email below & we'll send it straight to your inbox. Plus you’ll get affordable and easy gluten-free recipes delivered each week!
Best Recipe for Gluten-Free Dinner Rolls
Making soft gluten-free rolls has earned a special place in my GF bread Hall of Fame (right up there rivaling copycat Olive Garden gluten-free breadsticks). Not only were there delectable oohs and ahhs from me, enjoying these buttery, golden pillows, but my non-gluten-free family couldn’t stop singing the praises as well!
These easy gluten-free yeast rolls meet an unprecedented taste and texture standard, similar to this 5-Star viral gluten-free bread recipe. To meet that level, it had to incorporate all these criteria:
- Easy to make! It mixes together in one bowl, has one short rise, and bake.
- Simple ingredients I have stocked and ready at all times
- Quick and effortless – No one wants to spend all day making yeast rolls. These are ready to enjoy in one hour.
- Most important – Tastes BETTER than any gluten-free roll recipe out there. Seriously.
These homemade rolls have not only won me over, but have earned hundreds of raving reviews and testimonials across the website and Pinterest. They are going up there with one my proudest moments of creating gluten-free bread recipes that fool the toughest critic. 😎
My daughter was diagnosed with Celiac a year ago, and I have been attempting to make edible gluten-free bread for this entire year. As an experienced baker, it has been humbling to see (and taste…blech) the abject failures I have created during this time. Then I discovered this recipe, and EUREKA!!! Everyone at the table raved–even the gluten eaters! We couldn’t believe how spongy and delicious these rolls were! The texture was just like regular bread, and for the first time, there was no gritty aftermath. Just wonderful, comforting bread.
—Kate
These were absolutely amazing. My little family loved them and they were super easy to make. I have tried tons of different recipes from lots of the other popular gluten free websites and these were by far the softest and fluffiest rolls I’ve made.
—Lisa
Free Guide! 5 easy tips for baking like a gluten-free pro!
Simple hacks for fail-proof gluten-free dishes every time!
Ingredient Tid Bits
- Gluten-free flour – Using a good gluten free flour makes or breaks the quality of dinner rolls. Cup4Cup gluten-free flour is what I recommend in my GF cookbook and for for all my baking.
- Potato Starch (not flour) – Secret ingredient to making rolls soft and fluffy. Instead of relying on additional flour to structure the dough, I substituted another gluten-free starch. Use for best results, but tapioca starch or additional GF flour may be substituted.
- Psyllium Husk Powder – Helps maintain moisture and prevents the rolls from becoming crumbly. It also mimics gluten, allowing pull-apart rolls to be shaped. I recommended the linked brand because it will keep the rolls light colored instead of dark or even purple. Weird, I know…
- Instant (Rapid Rise) Yeast – I would suggest buying this is bulk and storing in your refrigerator. It doesn’t require mixing with warm liquids to proof and can be mixed right into dry ingredients.
- Butter – Melted butter flavors the dough and is brushed on before and after baking. I typically buy unsalted butter, so I add salt to the butter before brushing.
- Milk – Used to elevate taste, especially when mixed with butter and salt. For dairy-free dinner rolls, substitute non-dairy milk, such as almond or soy milk.
Let’s Make This Together!
(Below shows step-by-step photos and modified instructions. For the complete recipe, along with ingredient amounts, scroll down to the recipe card.)
How a roux (AKA tangzhong) changes everything!
Since GF flours do not absorb liquids as well, the roux helps pre-saturate some of the flour, helping absorb more liquid. This makes the texture soft and fluffy, rather than dense and gummy.
Even though the word sounds fancy, it’s easy to make. Combine 2 tablespoons flour with milk and water in a small saucepan. Whisk constantly over medium heat, until a trail separation appears at the bottom of the pan. That’s it. It takes a minute of your life.

Mixing the dough
Now we just dump everything in and mix. First, add the dry ingredients to the bowl. Use a paddle attachment to combine. Follow up with the wet ingredients – the slightly cooled roux, warm milk, egg, and melted butter. Mix on low speed to combine, then increase speed and beat for 5 minutes, stopping to scrape down the bowl once or twice. The dough will be stiff, but still sticky.

Time to shape the rolls
This is where rolls made with gluten-free flour have a massive advantage! They are really easy to shape. If you want to get technical about it, you could portion out the dough into 2 ounce portions using a food scale with a greased piece of plastic wrap on top. However, I just spray a 1/4 measuring cup with non-stick spray and scoop out slightly less than the cup size.

Quick shape and rise
Take the scooped dough and dump it out onto slightly greased hands. Smooth into a ball and then place in a greased 8X8-inch baking pan.
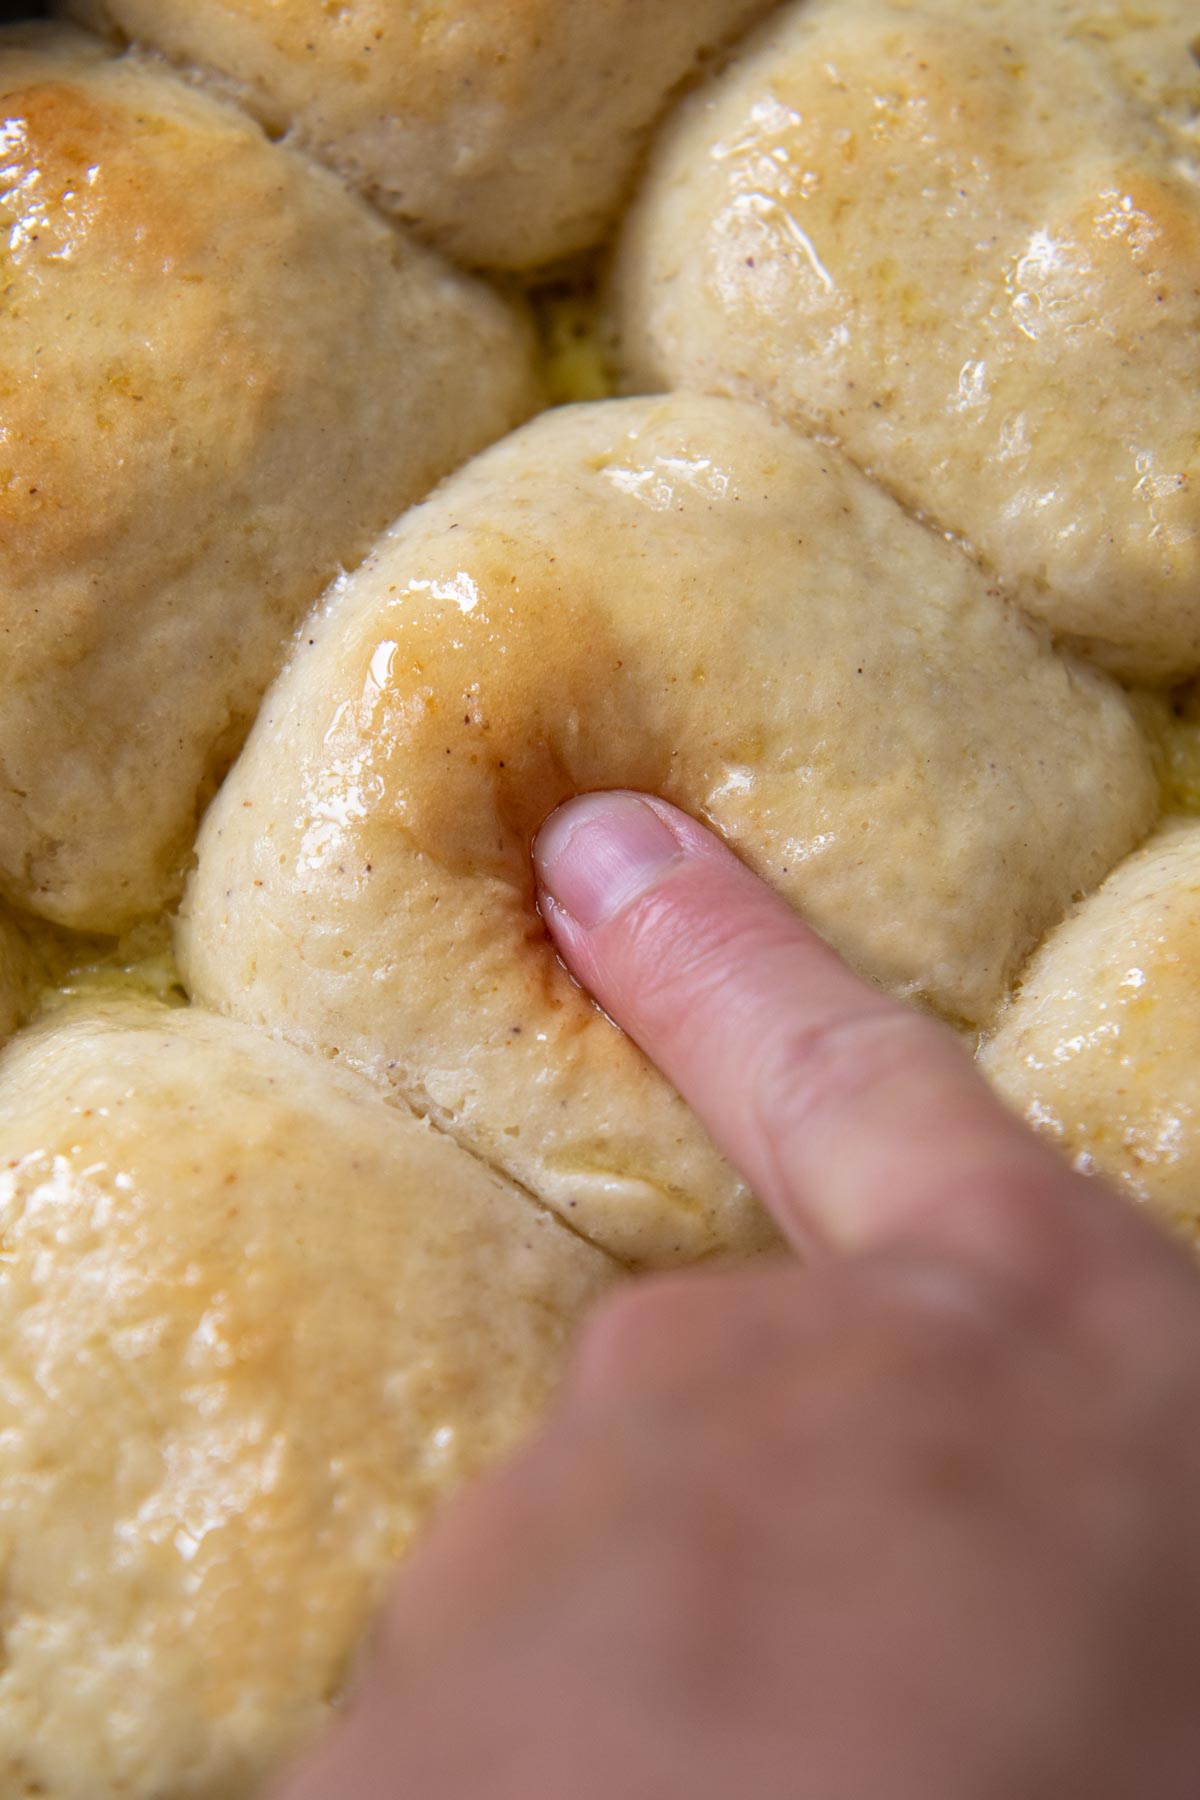
The rolls only need 30 minutes to rise because first they are placed in a slightly warmed oven for 10 minutes, then taken out to rise at room temp for 20 minutes while the oven preheats. Also, the baking powder in the recipe helps give them a nice loftiness while baking.
The pictures below show what they will look like before rising and after. Brush them with salted butter (Parker house rolls vibes!) and then more when they come out. Enjoy the most seriously heavenly GF recipe ever!


Trick To Shaping GF Yeast Rolls
When making gluten-free rolls, there is a balance between adding enough GF flour blend to make the dough elastic and easy to shape, yet still a yield fluffy, airy texture.
As to not toughen crumb, I add less flour than other gluten free dinner rolls recipe and rely on nonstick cooking spray and a measuring cup to shape the buns. This is similar to the technique used in some of my most popular recipes, like gluten-free hamburger buns and these soft gluten-free slider buns.
Spray a measuring cup liberally with cooking spray, along with your hands. Scoop out a little less than 1/4 cup, which yields about a 2 ounce dough portion. Dump the dough into greased hands and roll into a smooth ball.
Alternatively, use a greased silicone baking mat or parchment paper to dump the dough onto, flatten, then pinch up into a ball. Smooth the top and place pinched ends down in a greased baking pan.
Which GF All Purpose Flour Works Best?
I had already rigorously tested the best-performing gluten-free flour blend through many baking and bread recipes. Therefore, when making dinner rolls I reached for my preferred brand, Cup4Cup.
As far as taste, Cup4Cup was the clear winner. There was nothing “gluten free” tasting about the bread. It was soft, squishy, and slightly sweet. (By the way, it works with their new formula too.)
Although a lot of gluten-free bakers work with Bob’s Red Mill 1-to-1 GF Flour, I find it to have an unpleasing aftertaste and a denser crumb. If you are wondering about another brand, read through the comments below and see what others have used. This recipe has had success across a variety of brands!
Save this recipe to your pinterest board!
Let’s be friends on Pinterest! I’m always sharing great recipes!
Did you make this recipe? I love hearing from you! Leave a star rating and comment below the recipe card. It helps others when searching for recipes and I appreciate feedback from our community. You will always hear back from me! -Melissa

Squishy Soft Gluten-Free Rolls Recipe (1 Hour)
Ingredients
Roux
- 2 tablespoons (18 g) gluten free all purpose flour, I recommend Cup4Cup brand
- 3 tablespoons (45 g) water
- 3 tablespoons (45 g) milk
Rolls
- 1 ½ cups (214 g) gluten free all purpose flour, Cup4Cup gluten free flour highly recommended – see recipe notes for optional milk powder addition
- 3 tablespoons (31 g) potato starch
- 3 tablespoons (38 g) granulated sugar
- 1 tablespoon (11 g) psyllium husk powder, (what is psyllium husk?)
- 1 packet (7 g) (2 ¼ tsp) instant rapid rise yeast, see recipe notes for active dry yeast
- 1 teaspoon baking powder
- ½ teaspoon salt
- ¾ cup (184 g) warm milk (110°F), microwaved for 30-45 seconds
- 1 large egg, room temperature
- 2 tablespoons (28 g) melted butter, slightly cooled
Instructions
- Before you begin making the roux, turn oven to 200ºF. Start to make the roux, but turn it off once it reaches temperature. This will serve as an extra warm place for the rolls to initially rise. Grease a 8X8-inch baking pan. Set aside.2 tablespoons gluten free all purpose flour, 3 tablespoons water, 3 tablespoons milk
- As the oven is preheats, make the roux. Combine 2 tablespoons flour with milk and water in a small saucepan. Whisk constantly over medium heat, until a trail separation appears at the bottom of the pan. Remove from the heat and set aside.
- In a large mixing bowl of a stand mixer, combine the GF flour, potato starch, sugar, psyllium, yeast, baking powder and salt using a paddle attachment on low speed.1 ½ cups gluten free all purpose flour, 3 tablespoons potato starch, 3 tablespoons granulated sugar, 1 tablespoon psyllium husk powder, 1 packet (2 ¼ tsp) instant rapid rise yeast, 1 teaspoon baking powder, ½ teaspoon salt
- Add the warm milk, egg, melted butter, and roux. Combine on low speed until well blended. Increase to high speed and beat for 5 minutes, stopping to scrape down the bowl once or twice. The dough will be stiff, but still sticky.¾ cup warm milk (110°F), 1 large egg, 2 tablespoons melted butter
- Grease a silicone baking mat or parchment paper with cooking spray. Liberally spray ¼ measuring cup with cooking spray, along with your hands. Scoop out a little less than ¼ cup, which yields about a 2 ounce dough portion. Dump the dough onto greased hands and roll into a smooth ball. Alternatively, dump the dough onto the baking mat, flatten with fingers, then pinch up into a ball. Smooth the top and place pinched ends down in prepared baking pan.
- Cover with plastic wrap and place in the warmed, turned off oven for 10 minutes. Remove the pan from the oven and let sit at room temperature for 20 more minutes while the oven preheats to 350°F.
- Melt the additional 2 tablespoons butter with salt. Remove the plastic and gently brush the tops with the salted butter mixture. Reserve the remaining butter for after baking.2 tablespoons butter, ¼ teaspoon salt
- Bake for 20-22 minutes, or until tops are lightly browned and internal temp measured with an instant read thermometer reaches 195-200ºF. Immediately brush tops with remaining butter and serve warm.
Notes
Adding Milk Powder
This is a new addition to the recipe, so it’s completely optional, but adds moisture to the bread. Recently Cup4Cup removed milk powder from their formulation, so now I remove 1 ½ tablespoons GF flour and replace it with 1 ½ tablespoons gluten-free certified milk powder. You can do this with any GF flour blend, it doesn’t have to be C4C.Important Note About Serving
If pulling from the freezer and serving at room temp, thoroughly defrost the rolls first. If they are chilled slightly they will become crumbly when eating. For best taste and texture, warm slightly in the microwave before enjoying again!Using Active Dry Yeast
If you only have active dry yeast on hand, activate it by mixing in the warm milk (110ºF) and letting it sit for 5 minutes before adding to the dry ingredients.Dairy-free modification
You will need to make substitutions for the milk and butter. Substitute non-dairy milk, such as almond or soy milk. For the butter, use plant-based vegan butter. Since dairy-free butter contains more salt, cut the amount of salt in the dough and used for brushing in half.Expert tips to remember
- If you forget to warm the eggs to room temperature, place the whole egg in a bowl of hot water for 5 minutes.
- To make a double recipe, double all the ingredients and place the dough balls in a 9X13-inch pan to rise.
- An instant read thermometer is helpful for measuring the correct temp of the milk to activate yeast and take out the guesswork of when the rolls are done. The interior should ready 195-200ºF when ready to be pulled from the oven.
Serving, storing, and freezing tips
They may be wrapped tightly and left at room temperature up to 24 hours, but will lose optimal taste and texture quickly. For best results, freeze rolls after they completely cooled (at least 2 hours). Pull from the freezer to defrost at room temperature.This post contains affiliate links. My opinions are always my own. If you purchase a product through an affiliate link, I make a small commission – at no cost to you. Read full disclosure policy here.


I decreased the milk by a quarter based off of other reducing the batter was very wet. I think I should have cut it by half as it was still pretty wet. They rose beautifully but once they came out of the oven they fell some and were dense. I weighed all the ingredients and checked the temperature before taking them out of the oven. Any ideas? May try again.
Hi Meredith,
My apologies the recipe didn’t work out for you. I’m surprised you cut the liquids by so much and the batter was still very wet. You are using GF all purpose flour and potato starch? And you made the flour / milk / water roux to add to the dough?
Best,
Melissa
My recipe comes out very wet & unable to shape, I follow the recipe exactly and I use the cup4cup and all the same brand items you use in your recipe.
Would you recommend decreasing the milk or increasing the flour?
Hi Rhonda,
If you are using C4C, made the roux, and the potato starch, I’m not sure why they are unable to shape. This is a slightly looser dough because making them more stiff with additional GF flour will dry them out after baking. If you are sure all ingredients were measured correctly, next time I would hold back 1/4 cup milk and only add in what you need to have the dough come together. I’m sorry for the frustrations!
Best,
Melissa
Hello! This is the second recipe of yours I make. The dinner rolls came out really, really good. I made them slightly bigger because I want to make myself breakfast sandwiches with them. I miss eating breakfast sandwiches. I’m not only gluten free, I’m also dairy and soy free. I substituted some ingredients and they still taste amazing! Our whole house smells so good. Thank you. Thank you for creating and sharing your recipes with us. I’d like to make some focaccia bread next. Wish me luck.
Hi Karina,
Oh, I’m so glad to hear! Good news for you, the focaccia recipe is even easier than this one! No shaping, just mix, dump and bake. Let me know what you think!
Best,
Melissa
Can I use cornstarch to replace potato starch
Hi Annie,
I would just use 3T more GF flour. Enjoy!
Best,
Melissa
OK, thank you. Have you tried this with the King Anther Flour As I have had better luck with this flour?
Cup for Cup has sometimes been gritty..
Hi Annie,
Yes, it works with King Arthur as well if that is your preference. Enjoy!
Best,
Melissa
I really love this recipe, so I decided to double it when making it the second time. The grams for the flour stayed at 214 g when choosing x2. It shows the change from 1 1/2 cups of flour to 3 cups. I didn’t realize it until it was too late. Is there any way that can be corrected on the website? I will definitely try again!
Ugh, I’m so sorry, Linda! I’m actively trying to rectify this right now. I think I’ve figured out the issue, but it will take me a week or two to get all the recipes fixed. My sincere apologies for any wasted ingredients and time.
Best,
Melissa
You call for instant rapid rise yeast, and I have instant dry yeast. Google says these are similar but different. Do you know if it will cause any changes?
Hi Danielle,
It’s the same thing so you are all good!
Best,
Melissa
I love all of your recipes!!! They are amazing! My daughter was was 10 when diagnosed celiac in March of 2025 and has been missing all of favorites as she is a bread, pasta, and pizza lover. Your recipes have hit the mark EVERY SINGLE TIME. I made a handful of different roll recipes before thanksgiving trying to find the right one for her and yours were by far the best! Last weekend we had a birthday dinner party and we said we would bring rolls because there were several people who were gluten free but also dairy free, so I tried the substitutions to be dairy free and they were still amazing!!! I made a 4x batch and there wasn’t a single roll left over and everyone was raving about them. I use the Namaste allergen and gluten free flour from Costco. It is quite a bit denser so I go by weight on the scale not cup sizes or I would go way over the weight. Thank you so much for sharing your recipes!
Wow, thank you so much for this, Katie. This makes me immensely happy. And I really appreciate when readers write in what flours they used. It’s impossible for me to test them all with the recipes. There are so many options out there and they all are made up of different starches, so your feedback is so helpful!
Best,
Melissa
Has anyone tried using GF sourdough starter in this recipe?
Hi Linda,
I personally haven’t tried it, but I don’t see why it wouldn’t work. Getting my sourdough started this week so I can start experimenting with this!
Best,
Melissa
I had forgotten what dinner rolls tasted like!
These were amazing and I’m already looking forward to making them again.
My husband, who can and does eat gluten all the time, loved them also.
Love hearing this, Rose! Thank you for sharing.
Best,
Melissa
Total flop. Measured everything precisely in grams. Batter was so wet and sloppy – the mixture all moulded together, then sunk after baking even though internal temperature was as per recipe. End up with a dense square loaf
Hi Sally,
I’m so sorry to hear the recipe was not a success for you. If the batter was wet it definitely sounds like something went wrong with ingredient amounts. Which GF flour blend did you use?
Best,
Melissa
So easy to make and tastes fantastic. Great texture too
Thank you, Patricia!
Best,
Melissa
I have tried several of dinner roll recipes in the past year. This one is tastier and easier. It is now my go to dinner roll recipe. Yummy!
Thank you so much for letting me know, Susan! I appreciate it!
Best,
Melissa
I’ve made these several times and they are amazing! My husband prefers these over gluten rolls.
I was wondering, can the dough be frozen before baking? Would that be before or after proofing? I want to cook them on vacation, but will only have access to the oven.
Hi Danielle,
I’ve tried this before and they are OK this way, but not as great as proofing and rising. I would bake them, cool completely, wrap and freeze. Then on vacation I would thaw, cover with foil and rewarm in the oven for about 10 minutes in a 325 oven.
Best,
Melissa
How come the weight measurements don’t change when you increase the number of rolls but the cup measurements do???
Gluten free baking works best when you use weights! If someone isn’t paying attention they would not make them correctly!!
Ugh, I know. This is something I have been struggling with. I like to manually put in the weights because I don’t trust the automated conversions. But then if you use the auto scaler it doesn’t convert. I can turn off the auto scaler, but sometimes I like to use that feature. Any thoughts?
Best,
Melissa
That’s frustrating, you’d think they’d make a converter that does both.
Maybe a disclaimer at the top of the recipes saying that the weight measurements won’t change if you increase or decrease the recipe size?
At least that way people will have a heads up and can do some quick math before they start?
Yes, I think that’s a great idea. I will make a note to do that!
Best,
Melissa